
How to Create Optoma Warranty Cards
Required Software:
- Spreadsheet (e.g. Excel)
If you need to create a new template:
- PDF Editor (e.g. InDesign)
- XBL Barcode Generator (link)
Creating a Batch
Visit https://experimental.dev.silvertoad.co.uk/optoma.
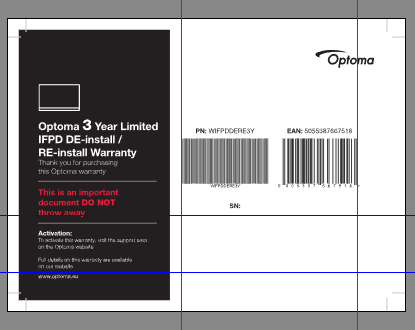
This will show you a list of currently defined templates – each template represents one warranty type. A template includes all the elements of the warranty PDF that don’t change for each serial number – the background graphics and text, the Part Number (PN) label and barcode, the EAN label and barcode, and the ‘SN: ‘ label.

If it’s a new batch of an existing warranty type, and the design of the document hasn’t changed, the existing template should be adequate. Select the template you’d like to use from the list.
The template page shows the first/front page of the warranty card only.
Generate a preview by entering a serial number (in the ‘spaced’ format – e.g. ‘2705 7086 6049 0215 49’) into the field below ‘Preview’ and clicking the button. It will open the generated PDF in a new page.
If it looks wrong, you may need to adjust the template – see the next section.
If it’s correct, move on to generating the rest of the batch. At the bottom of the page is a ‘Generate’ button – click this. You’ll be prompted to select a file.
The serial numbers are expected to be in the first column, in ‘spaced’ format, with a column header. Additionally, if the file contains more than one sheet, the tool will use serial numbers from the first sheet only. This is the format Optoma have supplied them in in the past, but if you’re using a spreadsheet with a different structure, you’ll need to modify it in Excel to match the format expected (or poke Mark.)
After selecting a file, the tool will show you a list of the serials it’s found:
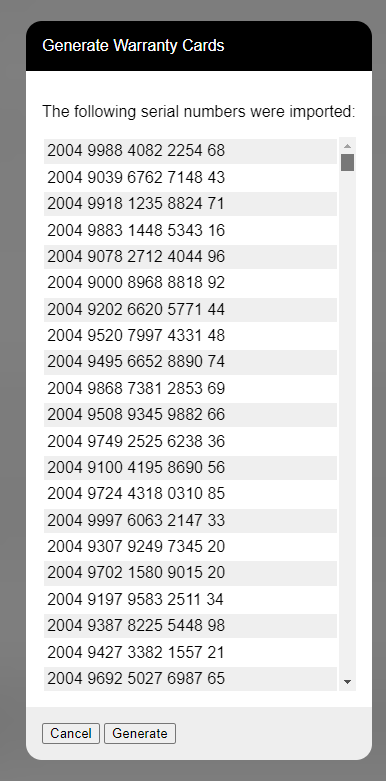
If everything looks okay, click ‘Generate’.
The resulting file is quite large, and will take several minutes to generate and download. A batch of 1,000 serials will end up being approximately 600 MB, but it depends on the complexity of the template.
Note: Due to the configuration of the server where the tool is currently hosted, big batches might get ‘cut off’. If this happens, split it into smaller batches. I hope to move the tool to a different server that will prevent this problem.
The downloaded file will be a standard .zip archive, containing one PDF per warranty card. These should be ready for printing. With any luck, you’re done!
Creating or Modifying a Template
If the design has changed, or a new PN/EAN is required, you’ll need to create a new template.
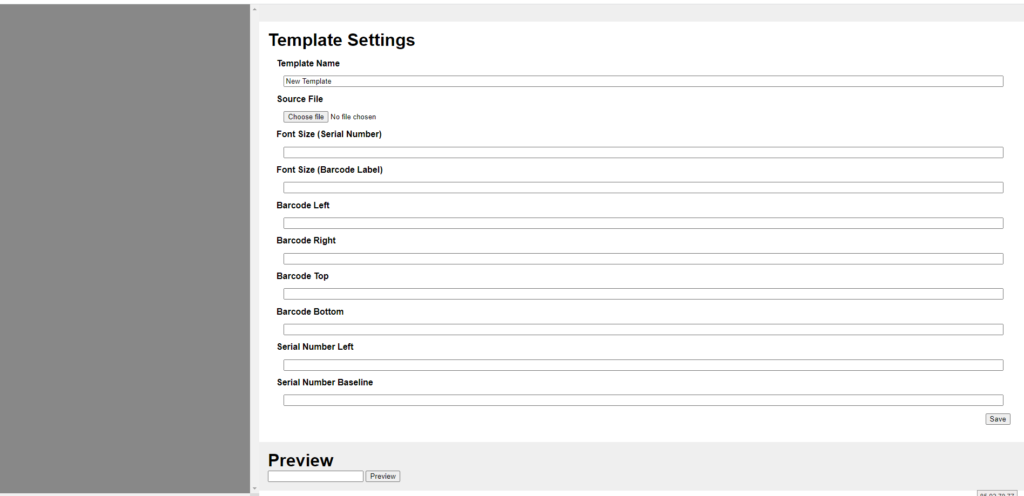
From the initial menu, select ‘Create Template’.
You will need to add all ‘static’ elements to the template PDF. Ideally, you’ll have an example PDF with PN and EAN barcodes in place, and all you’ll need to do is add bleed and crop marks.
If you need to generate new PN and EAN barcodes, use the XBL Barcode Generator app linked above.
The PN barcodes should be generated with the following parameters:
- Format: Code39
- Font: Arial, 12pt
- Alignment: Centre
- Show Text Label: Yes
Set the dimensions as required to fit in the PDF.
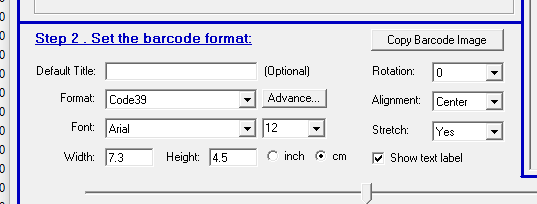
EAN barcodes should use:
- Format: EAN-13
- Font: Arial, 12pt
- Alignment: Centre
- Show Text Label: Yes
Export the barcodes as EMF (an ancient vector format) and add them to the PDF.
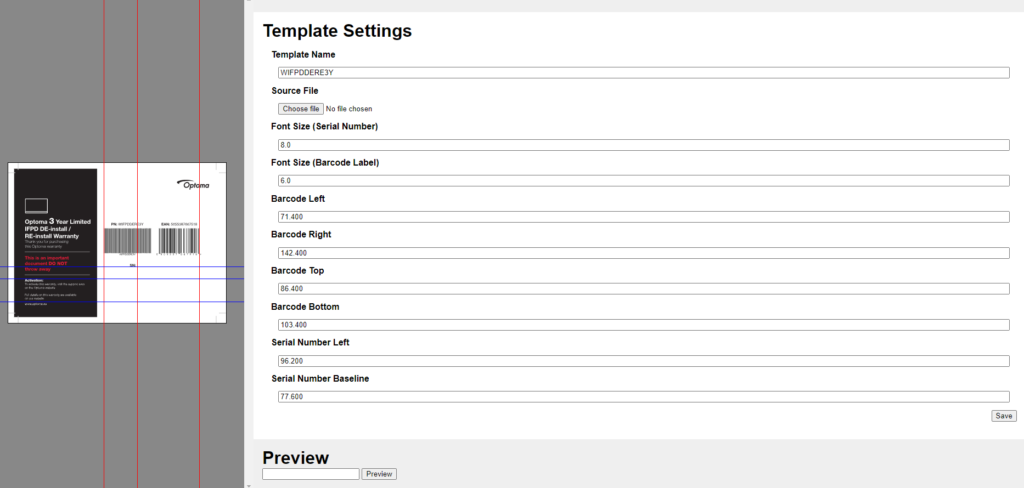
After the PDF has been modified appropriately, drag and drop the file onto the dark grey preview area on the template editor:
You’ll then need to set the parameters that affect where the tool positions the dynamic information on the template. These are the fields on the right.
The ‘Barcode’ fields affect the location of the serial number barcode. These are measured in millimetres from the top-left corner of the art box of the PDF. As these fields are modified, the guidelines on the preview section will move to indicate the location. You can also drag these gridlines to set the location graphically:
The ‘Serial Number’ fields control where the SN will be added. This location needs to be at the baseline (bottom) of the left edge:

The other two fields are the font size for the labels.
After making changes, ‘Save’ the template and preview it. Adjust as necessary.